Manage Devices

Manage Devices

Important: The options outlined on this page may be reliant on permissions that are set by your service provider. If you do not see an option, you may not have the required permissions to perform the action.

For more information about these permissions, please contact your service provider.


With the Manage Devices page available on the Customer app and Customer website, you can view and manage your entire device ecosystem in one place.

Features

  • View and manage all existing devices from one centralized location with intuitive device categorization.
     
    Note: Device categories include: Lights, Locks, Garage Doors, Security, Thermostats, Water, Video Devices, Cars, Location Services, Voice Assistants, Audio, Detectors, Doors, and Other.
     
  • Add new devices​ using the Add Device Portal.
     
    Important: The service package must support devices (e.g., video devices, lights, water sensors, etc.) for them to display in Manage Devices on the Customer app and Customer website.
     
  • Quickly rename and remove devices or access additional device-specific settings​.
    • Accessing a device's settings will take you to the device-specific section and may vary based on whether you log in from the Customer app or Customer website.

Access Manage Devices

Note: Equipment must be supported on the service package to display in Manage Devices on the Customer app and Customer website.

To manage devices using the Customer app:

Important: The Alarm.com app version must be 4.17.1 or higher for iOS and 4.15.2 or higher for Android to access the Manage Devices page.

  1. Log into the Customer app.
  2. Tap Menu.
  3. Tap Manage Devices.
  4. Find the desired device to manage.
  5. To access additional settings, tap More.

For more information about a specific feature of Manage Devices, see any of the following sections.

To manage devices using the Customer website:
  1. Log into the Customer website.
  2. Click Manage Devices.

    Manage_Device_Small.PNG
     
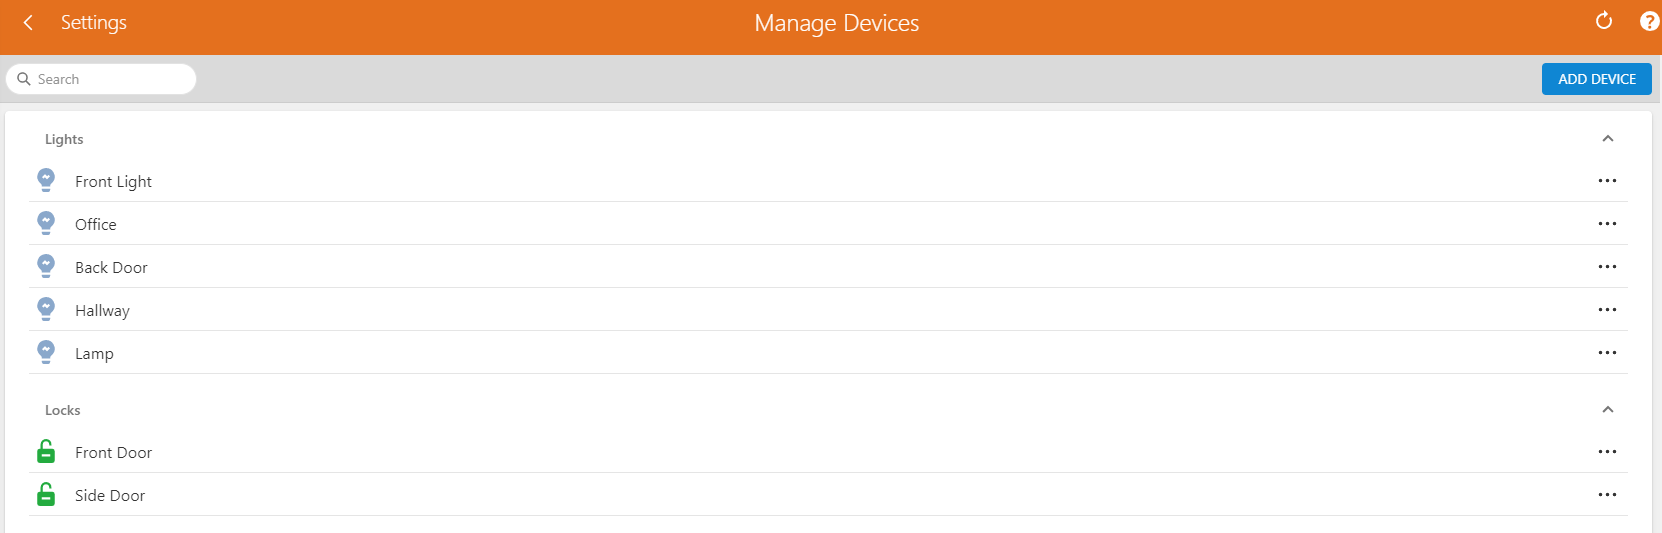
  3. Find the desired device to manage.

    Manage_Device_List.PNG
     
  4. To access additional settings, click More.

Add deviceicn-chevron-down.svg

To add a device using the Customer app:

Important: The Alarm.com app version must be 4.17.1 or higher for iOS and 4.15.2 or higher for Android to access the Manage Devices page.

  1. Log into the Customer app.
  2. Tap Menu.
  3. Tap Manage Devices.
  4. Tap Add. 
  5. In Add Device, tap to select the type of device to be added. 
  6. In Devices, tap to select the device to be added. 
  7. Follow the Add Device wizard to install the device. 
To add a device using the Customer website:
  1. Log into the Customer website.
  2. Click Manage Devices.
  3. Click Add Device. 

    Add_Device.PNG
     
  4. In Add Device, click to select the type of device to be added. 
  5. In Devices, click to select the device to be added. 
  6. Follow the Add Device wizard to install the device. 

Rename deviceicn-chevron-down.svg

To rename a device using the Customer app:
  1. Log into the Customer app.
  2. Tap Menu.
  3. Tap Manage Devices.
  4. Find the desired device to manage.
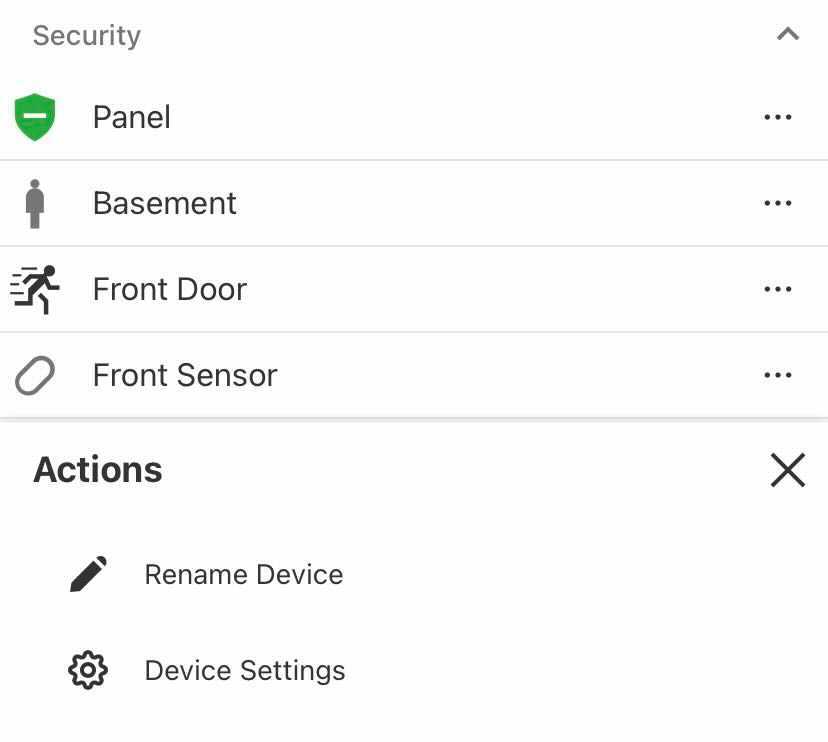
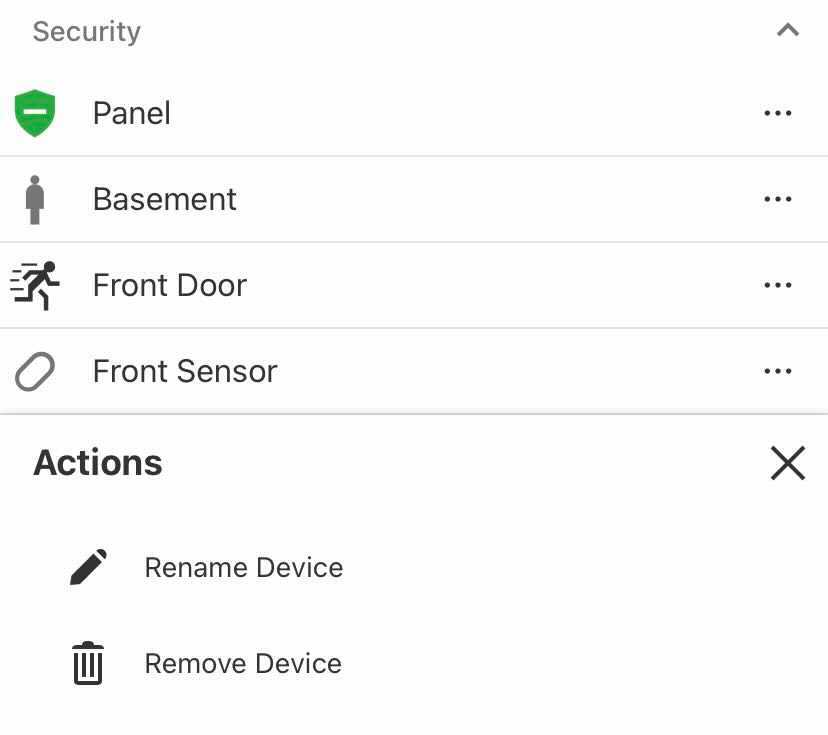
  5. Tap More.
  6. Tap Rename Device. 

    Image from iOS (1).jpg
     
  7. In the Rename Device field, enter the desired name. 
     
    Note: There may be limitations to renaming third party devices.
     
  8. Tap Close. 
To rename a device using the Customer website:
  1. Log into the Customer website.
  2. Click Manage Devices.
  3. Find the desired device to manage.
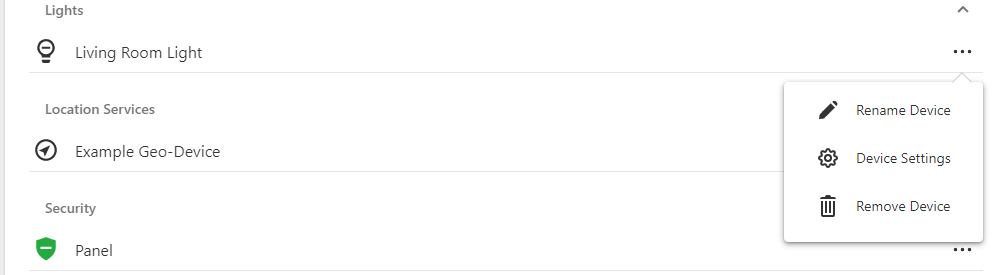
  4. Click  More.
  5. Click Rename Device. 

    Manage_Device_Options.PNG
     
  6. In the Rename Device field, enter the desired name. 
     
    Note: There may be limitations to renaming third party devices.
     
  7. Click Rename. 

Remove deviceicn-chevron-down.svg

To remove a device using the Customer app:
  1. Log into the Customer app.
  2. Tap Menu.
  3. Tap Manage Devices.
  4. Find the desired device to manage.
  5. Tap More.
  6. Tap Remove Device. 

    Image from iOS (1).jpg
     
  7. Follow the on-screen prompts to remove the device from the system.
To remove a device using the Customer website:

Important: For assistance removing Z-Wave devices that are no longer communicating, contact your service provider.

  1. Log into the Customer website.
  2. Click Manage Devices.
  3. Find the desired device to manage.
  4. Click  More.
  5. Click Remove Device. 

    Manage_Device_Options.PNG
     
  6. Follow the on-screen prompts to remove the device from the system. 

Edit device settingsicn-chevron-down.svg

To edit a device's settings using the Customer app:
  1. Log into the Customer app.
  2. Tap Menu.
  3. Tap Manage Devices.
  4. Find the desired device to manage.
  5. Tap More.
  6. Tap Device Settings.

    Image from iOS (2).jpg
     
  7. Make any desired changes to the device's settings. 
To edit a device's settings using the Customer website:
  1. Log into the Customer website.
  2. Click Manage Devices.
  3. Find the desired device to manage.
  4. Click  More.
  5. Click Device Settings. 

    Manage_Device_Options.PNG
     
  6. Make any desired changes to the device's settings.